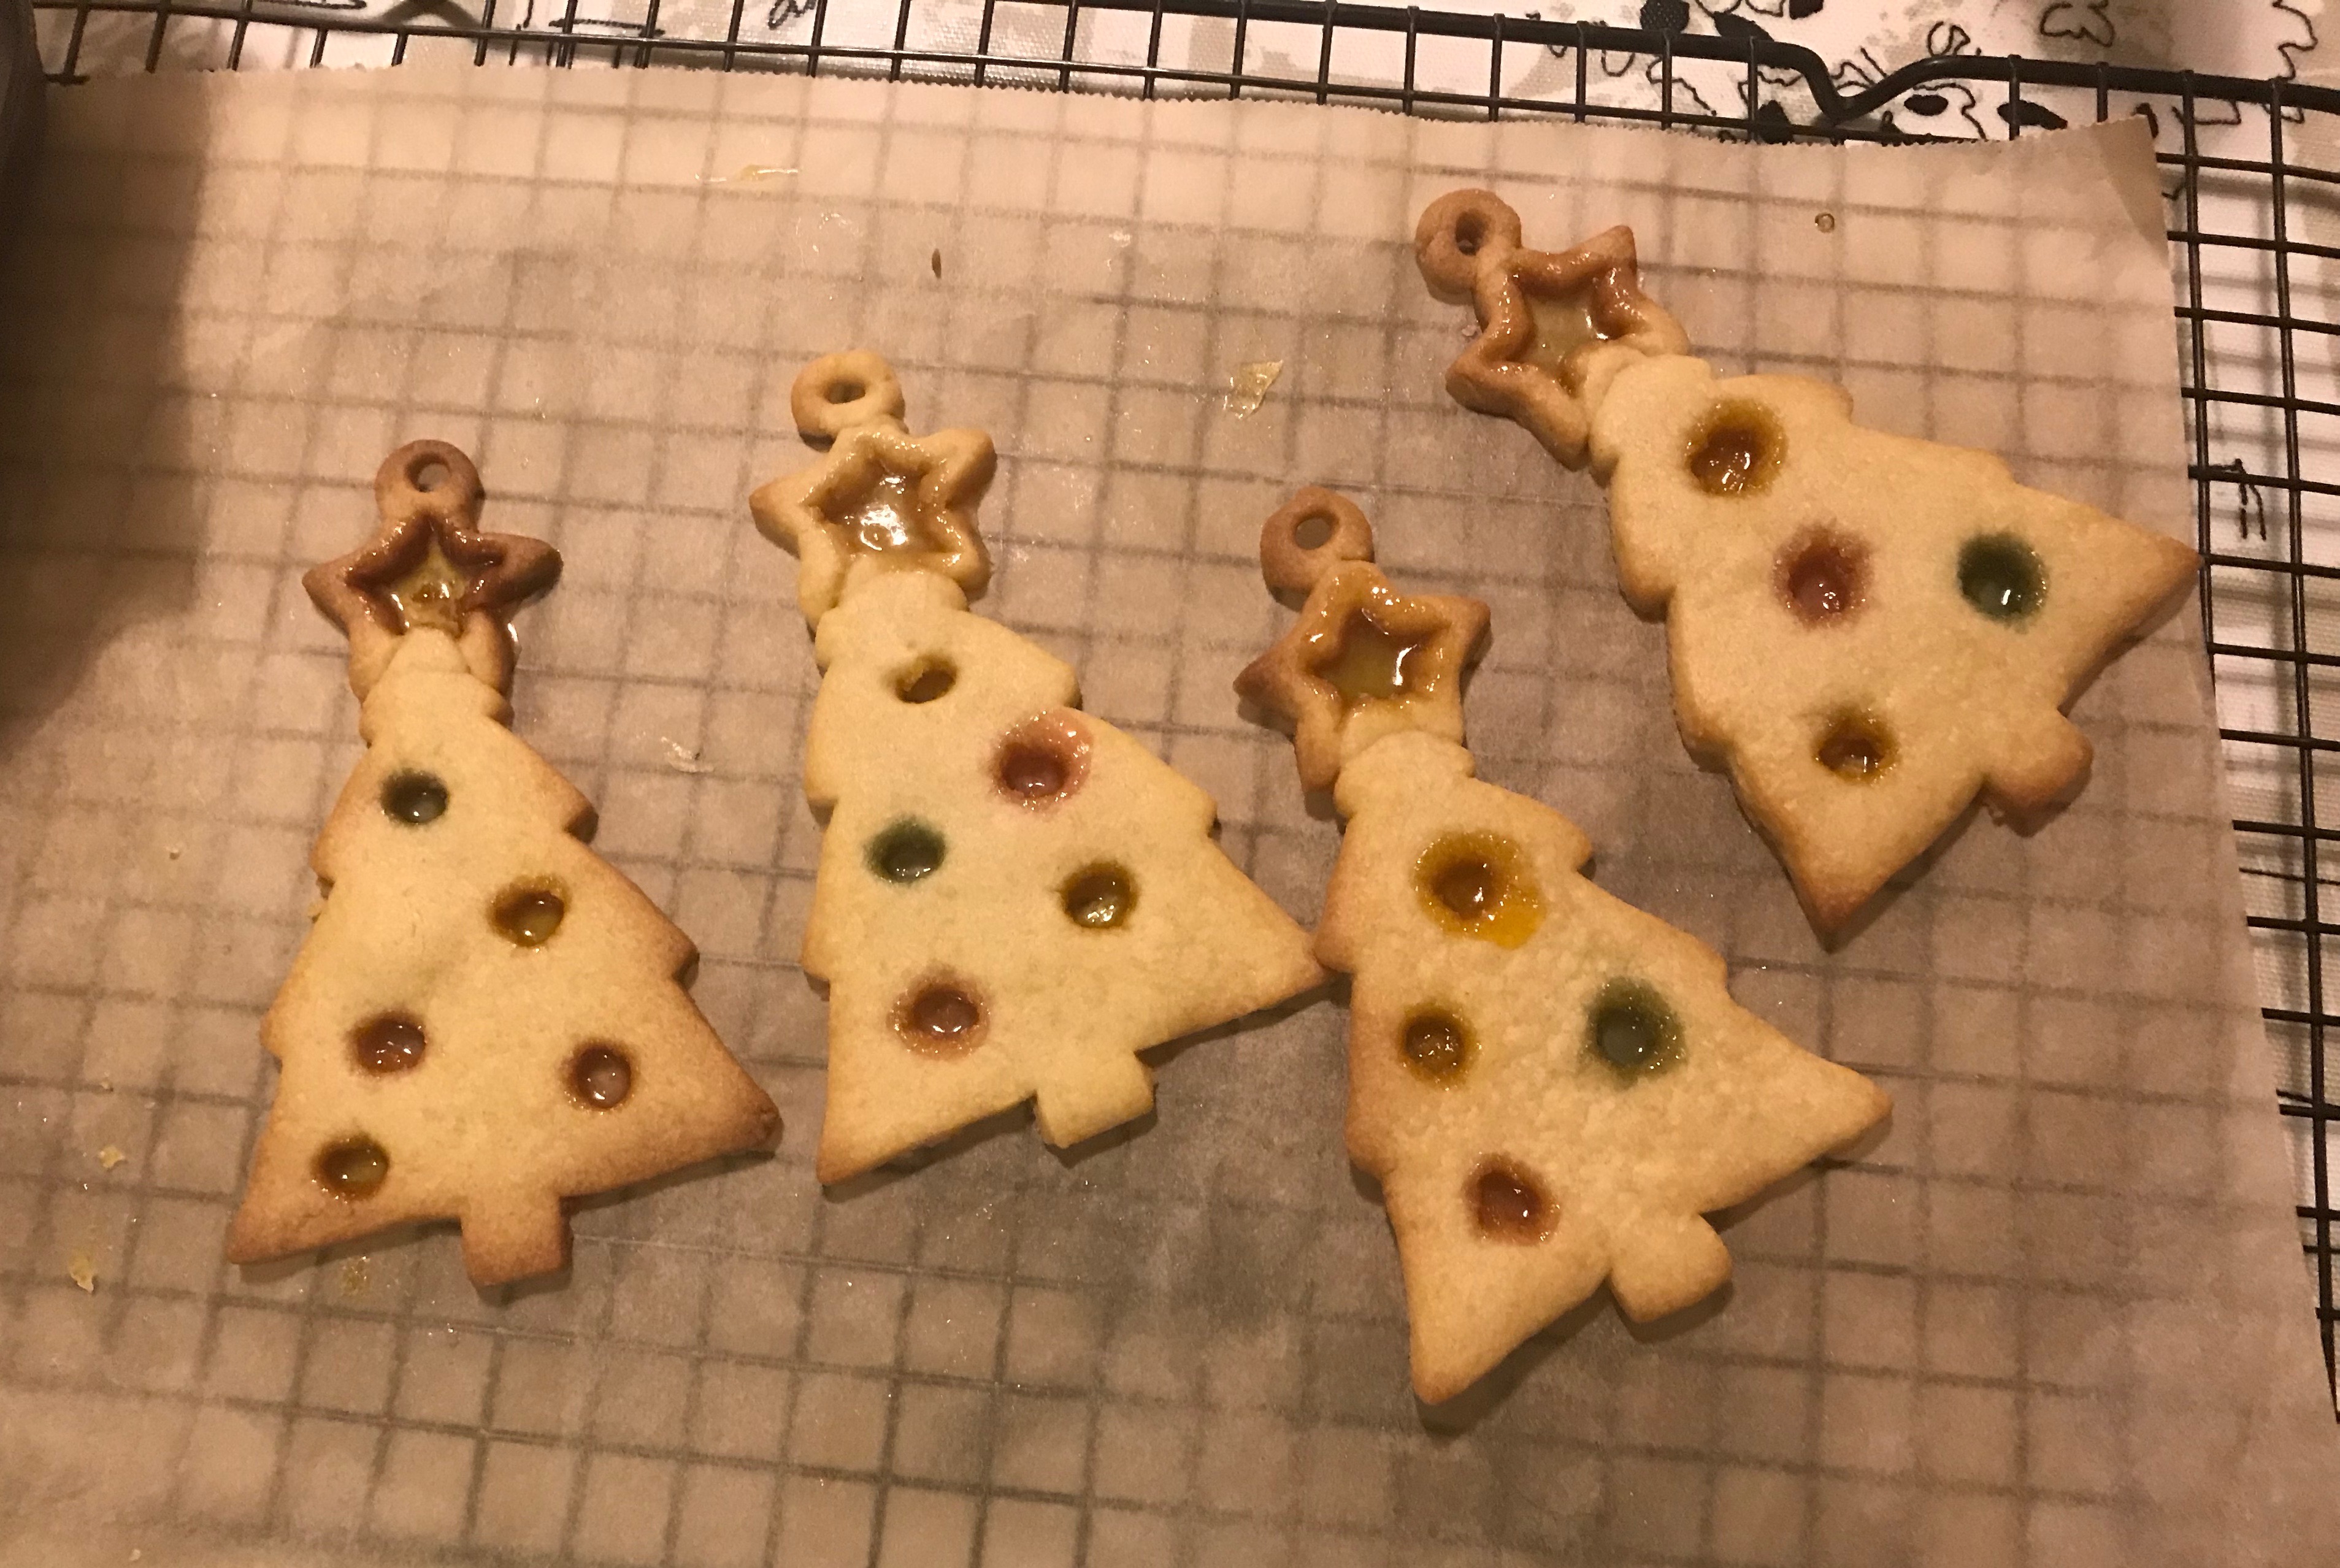
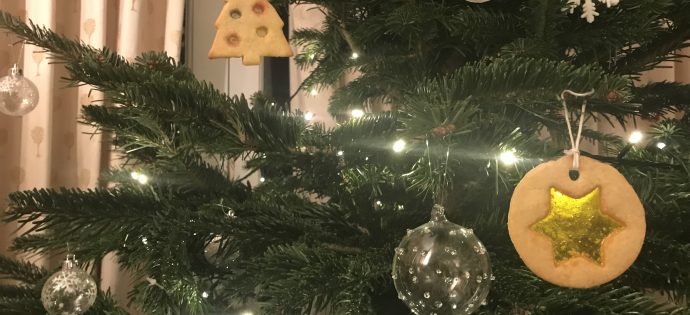
I’ve always thought these biscuits look stunning so, this year, with some helpful advice from Alice Kentish of Hopscotch who have some lovely ones displayed in their shop window, we gave stained glass biscuits a try.
Alice uses a recipe by Peggy Porschen and follows it to the letter, chilling wherever it says to do so as this stops the biscuits spreading in the oven. Alice also recommends using a good non-stick rolling pin to get an even 5mm thickness. Any cookie cutter will do, but the PME metal sets are really good as the smaller of the set cuts a matching hollow where the sweets for the stained glass go. (We’ll try these next time as this year we made do with our old ones.)
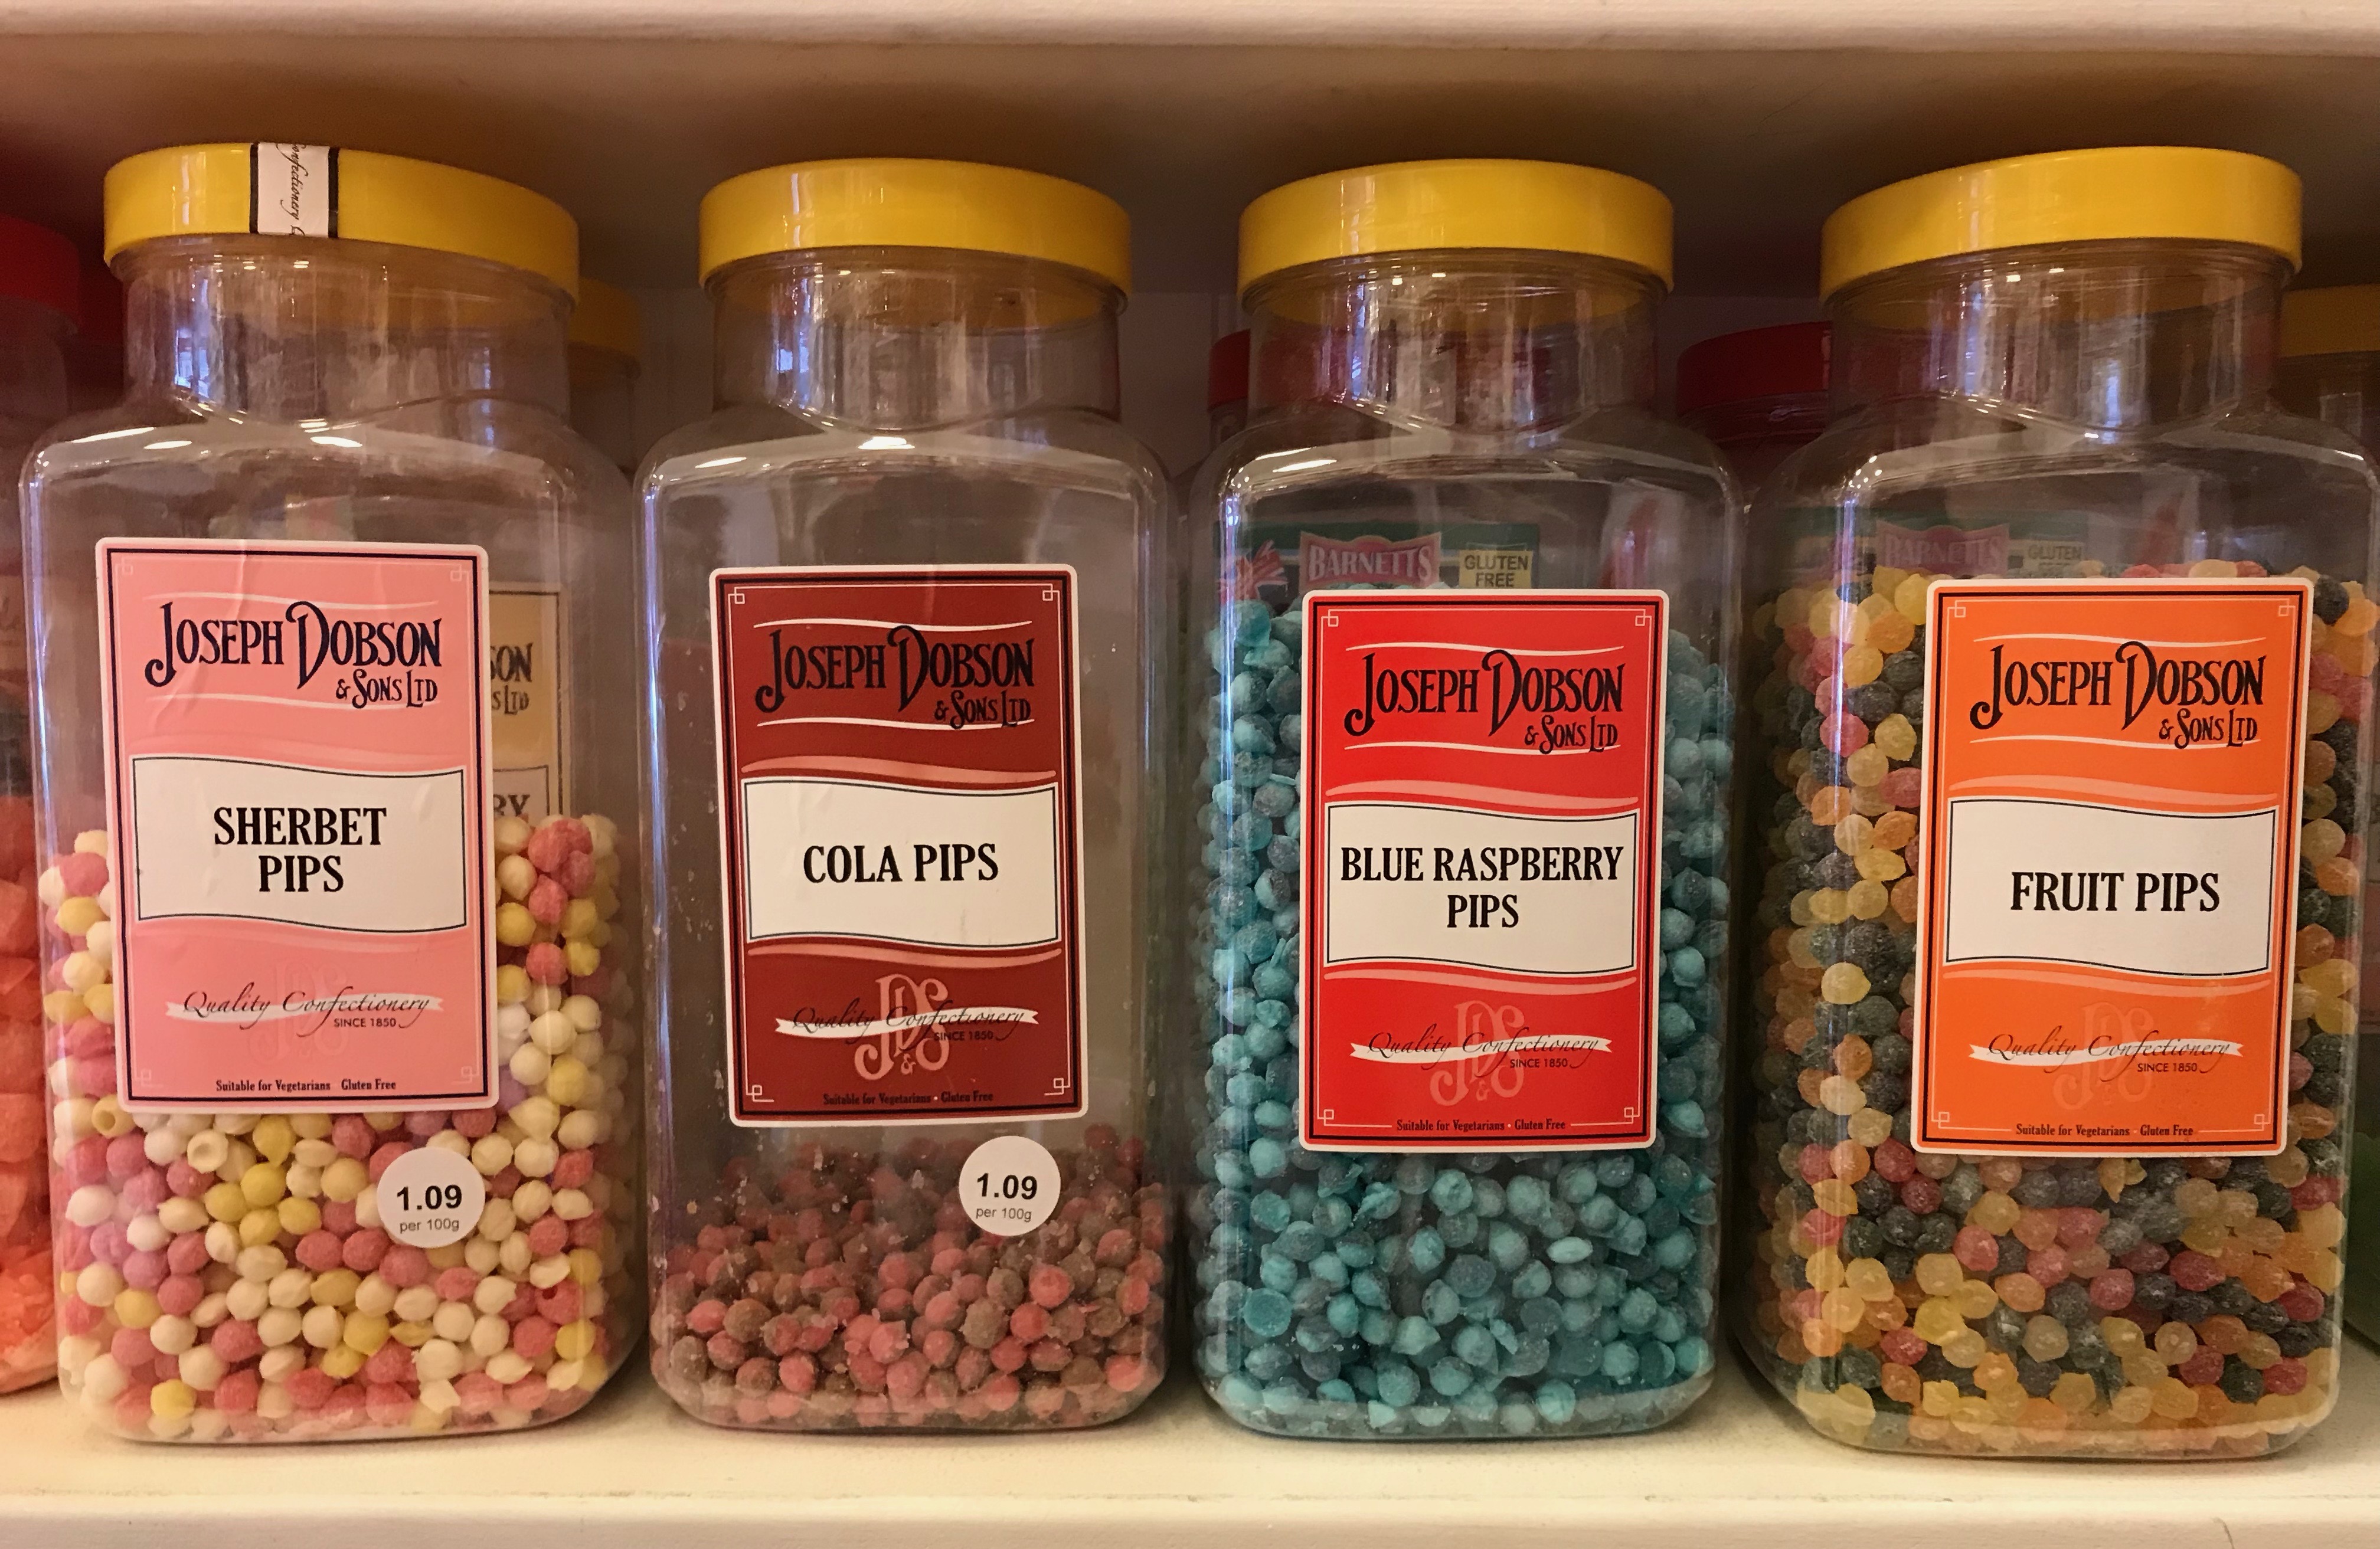
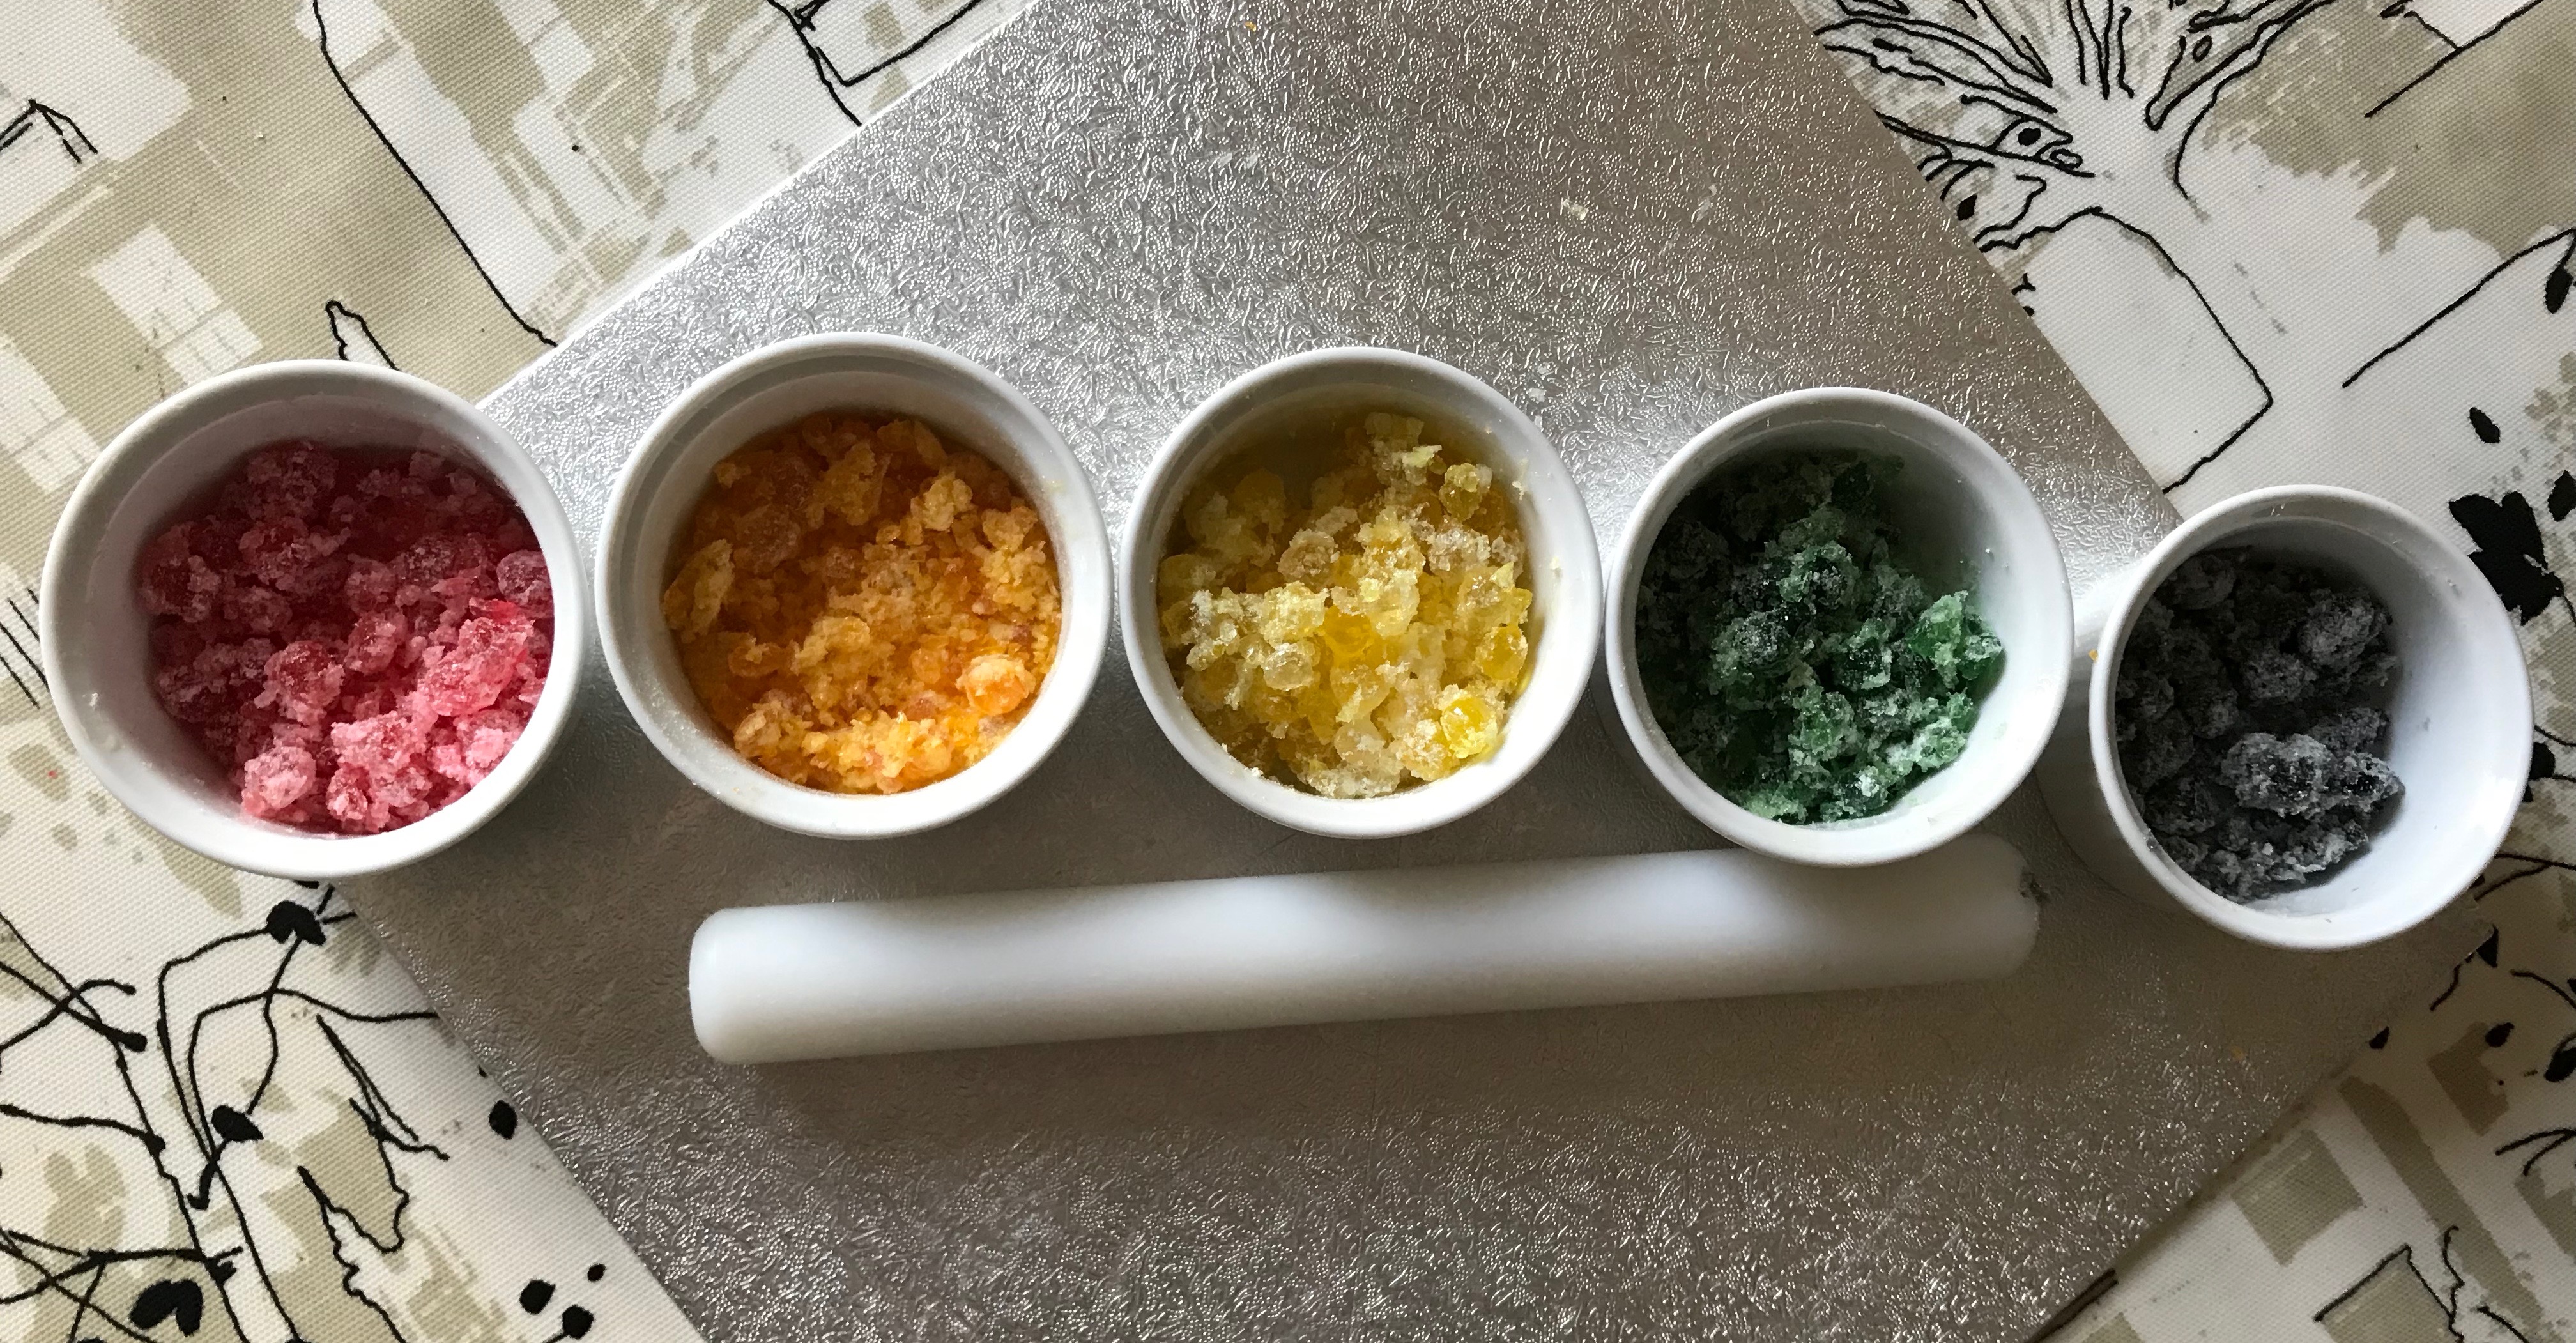
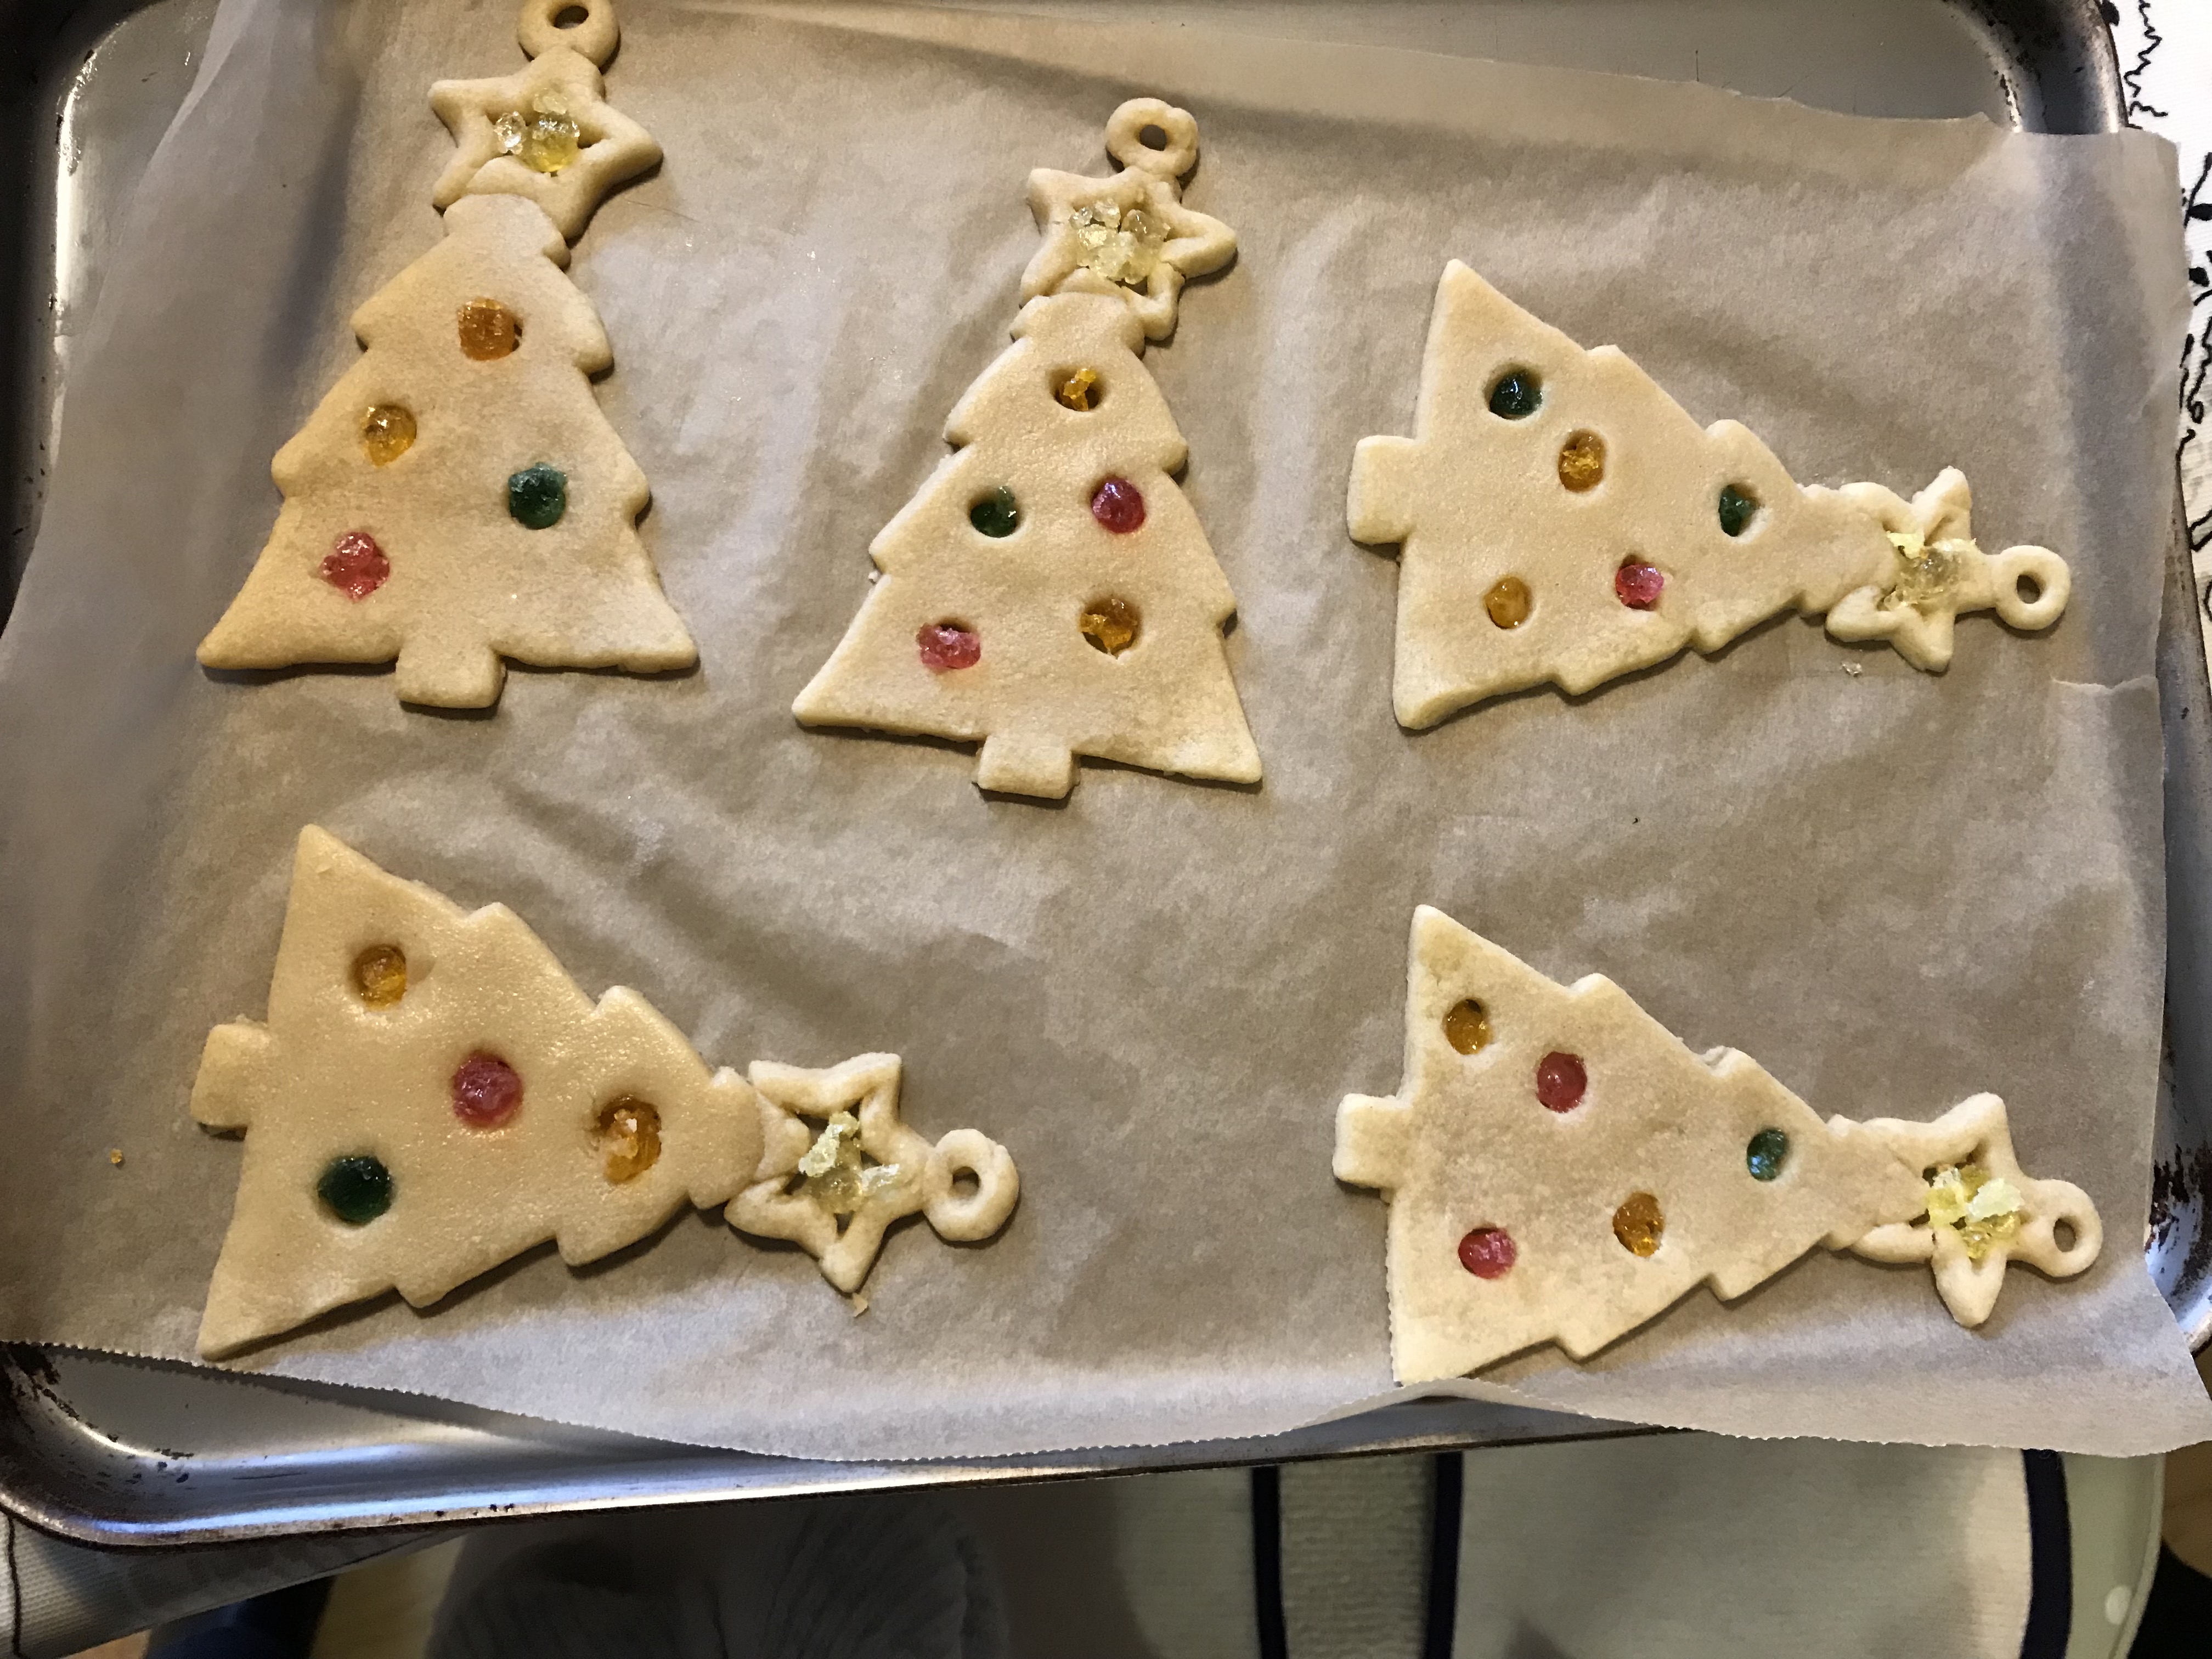
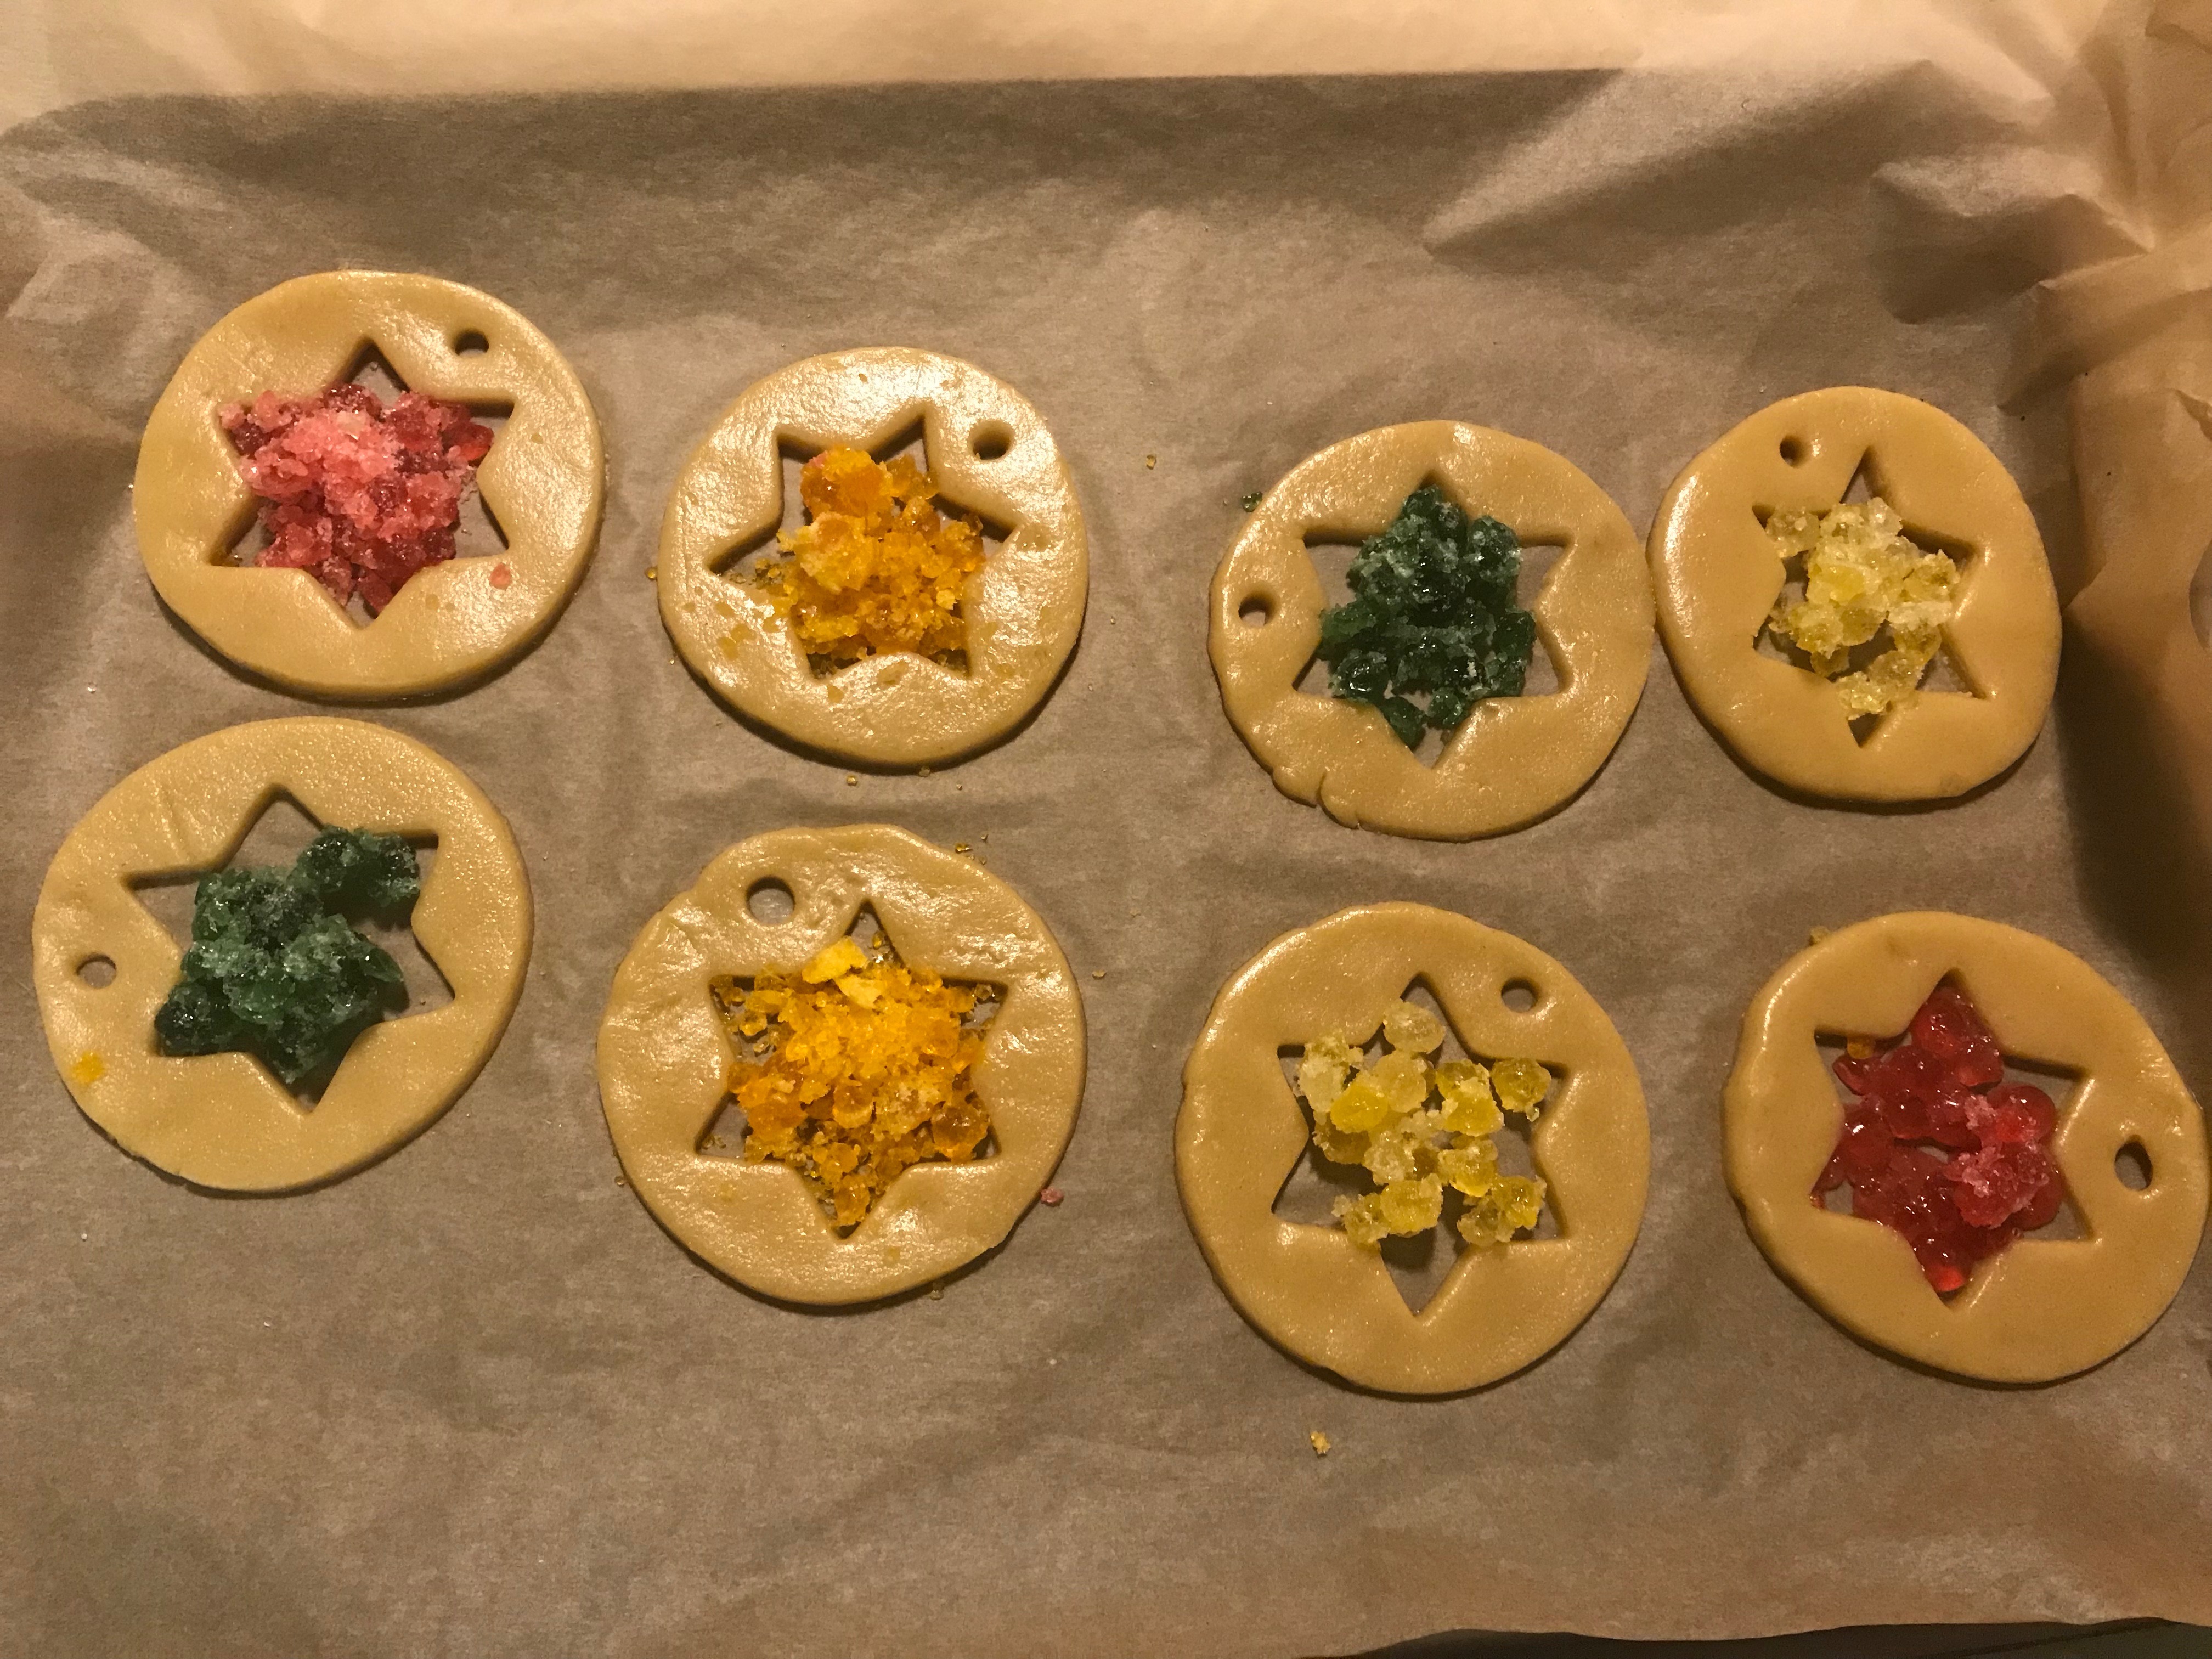
The stained glass effect is from melted boiled sweets and sugar free or ordinary boiled sweets work equally well. If using wrapped boiled sweets break them up into small bits first. Use a rolling pin and keep the sweet wrapped, as you bash it the wrapper will reduce any mess you might make, alternatively just use pips and wash them first to remove any sugary coating. For best results partly bake the biscuits before putting in the boiled sweets, doing this seals the cut edges and minimises any “bleeding” of the sweet into the cookie. For Christmas tree decorations make sure you make a hole for the ribbon before baking. A drinking straw is ideal for this.
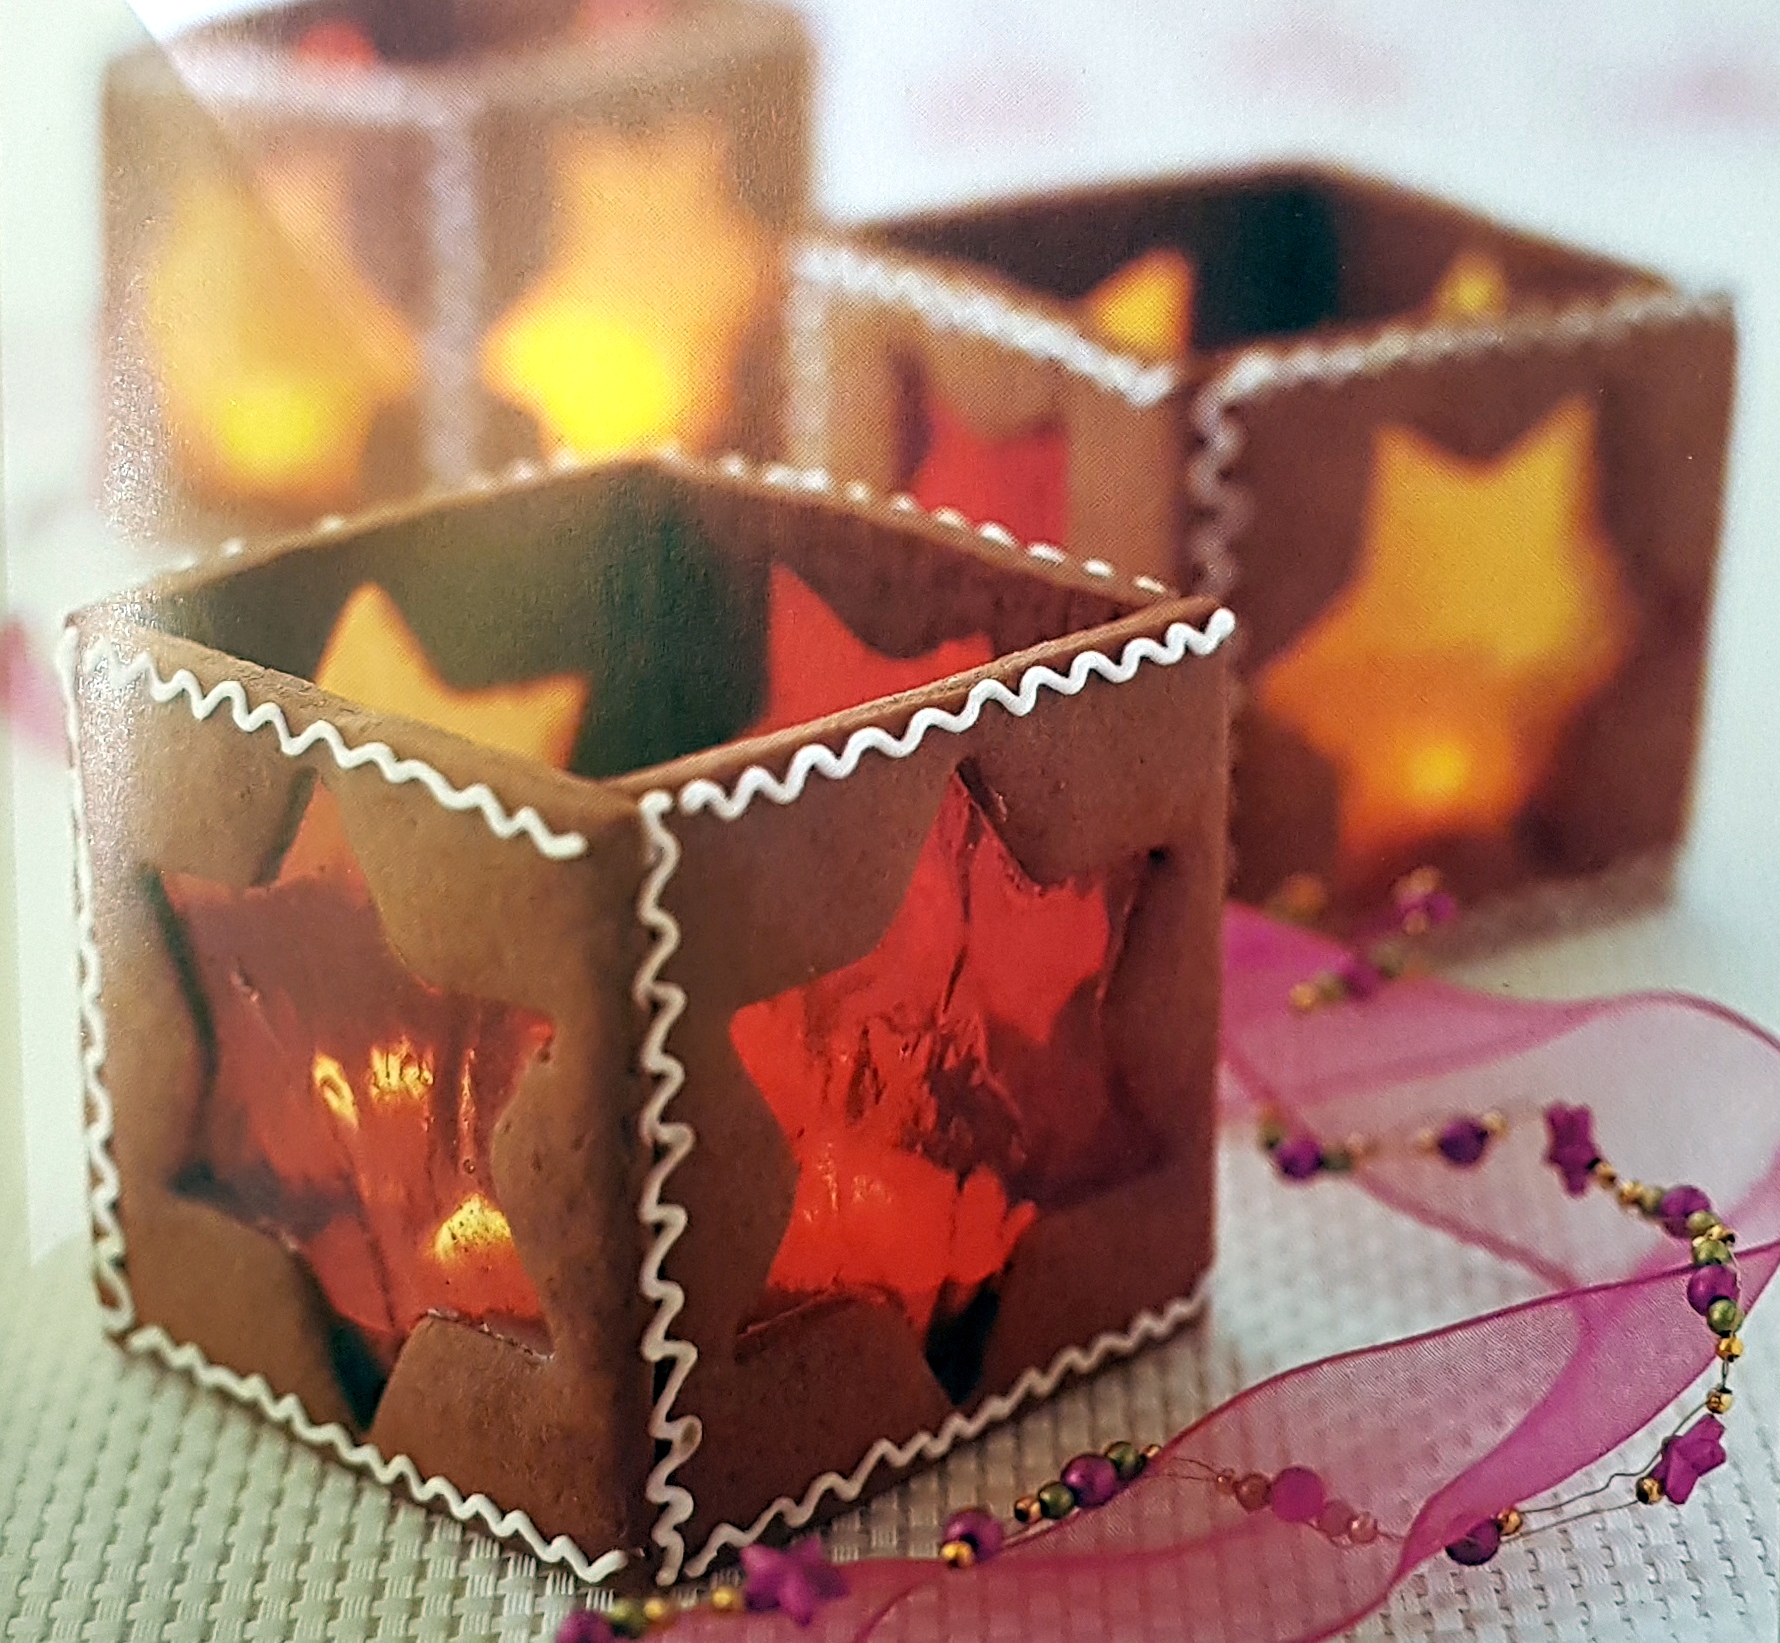
For the ultimate Christmas gift use square cookie cutters, stick them together using royal icing to form a box shape without a lid and with the stained glass on the four upright sides. Finally pop a tea light in and there you have it, a unique, beautiful and edible gift. These should not be left unattended in case of fire. (The picture of these is from Peggy Porschen’s book.)
Here is our recipe adapted from Peggy Porschen’s for vanilla cookies:
200g butter, softened
200g caster sugar
Seeds of 1 vanilla pod or 1 tbsp vanilla extract
A pinch of salt (if using unsalted butter)
1 medium egg, lightly beaten
400g plain flour, plus extra for rolling out the dough
You can also add some powdered ginger and/or orange zest for a more wintery flavour.
Line 2 baking trays with greaseproof paper.
Place the butter, sugar, vanilla and salt in a bowl and cream together. Do not overwork the mixture, or the biscuits will spread during baking.
Beat the egg in a jug and slowly add to the butter and sugar mixture until well combined. Sift in the flour and mix together. Gather the dough into a ball, wrap in cling film and chill for at least 30 minutes.
Place the dough on a lightly floured surface and briefly knead to soften. Roll out the dough, until about 5mm thick.
Preheat the oven to 175°C/Gas Mark 3. Use cookie cutters to cut out the desired shapes and arrange the cookies onto the prepared baking trays. Chill again for about 30 minutes, or until cool and firm.
Pre-bake the biscuits for about 3 minutes to seal the edges before carefully filling the holes with the crushed sweets.
Bake the biscuits for 8–10 minutes, or until the edges are golden brown and the sweets melted. Leave to cool completely on a wire rack.
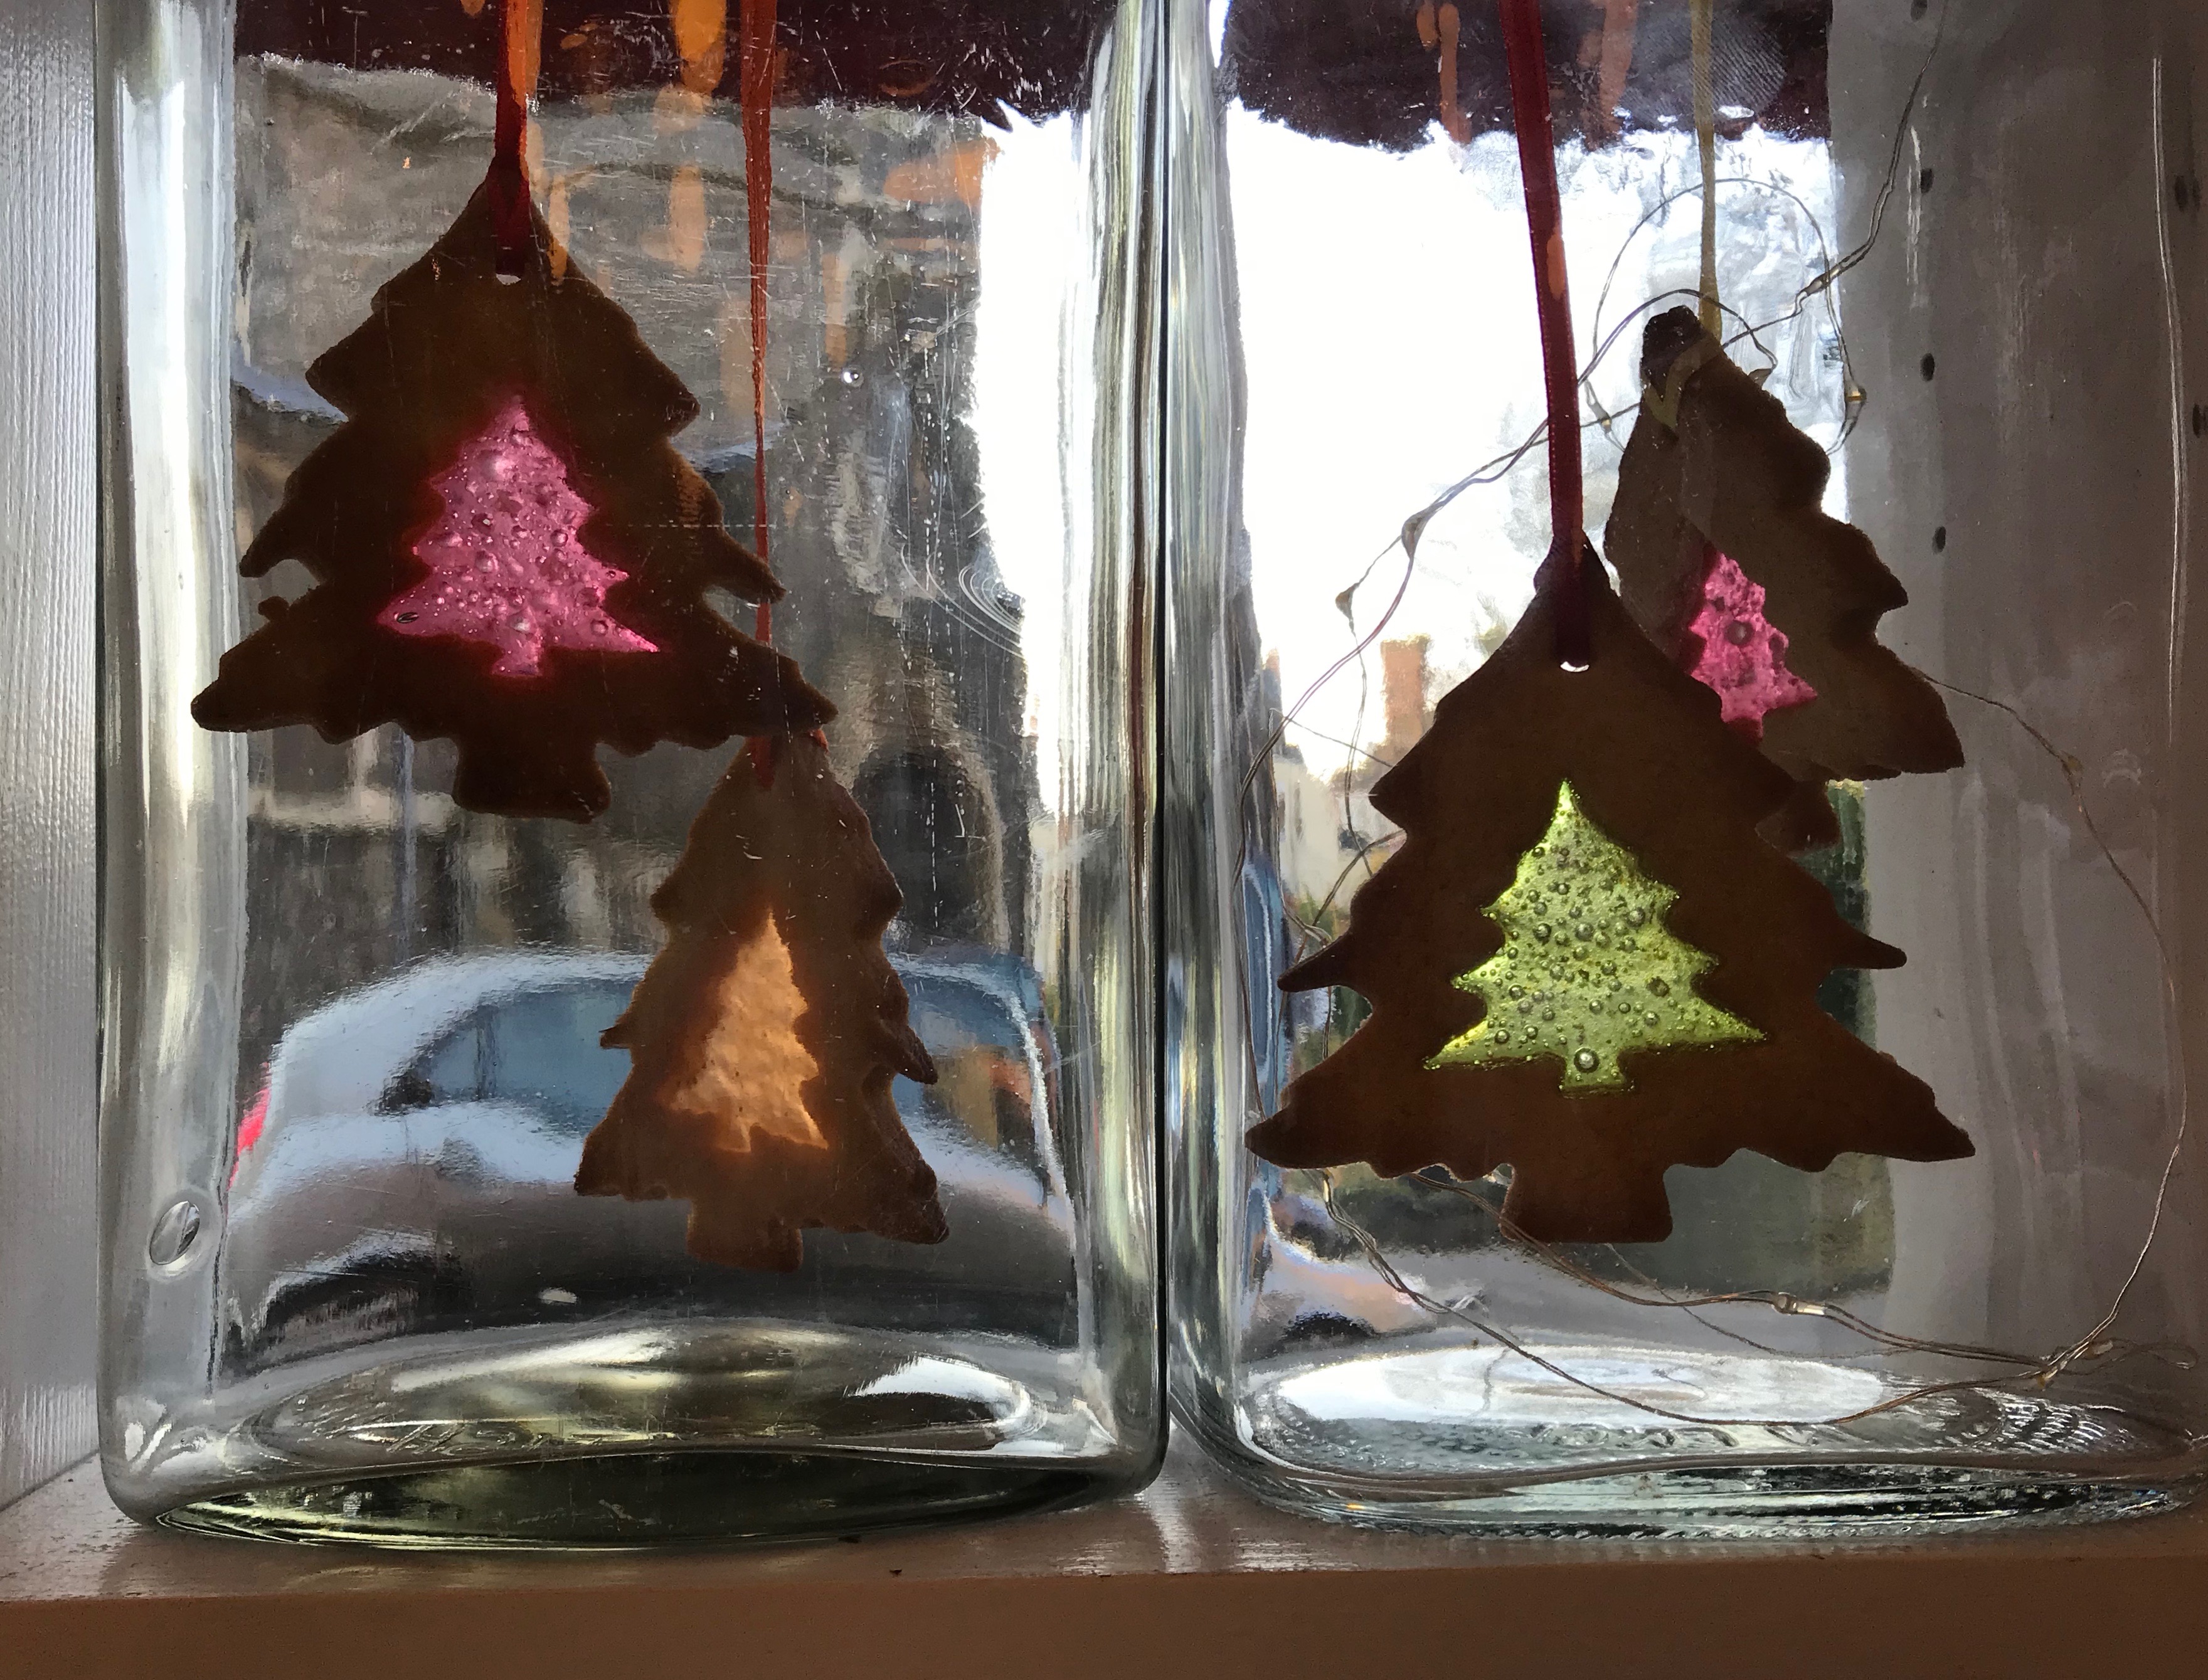
Once the molten sweets have cooled and hardened the biscuits can be thread with string or ribbon and hung from the tree (with the fairy lights shining through the windows).
It’s good cooking the biscuits in batches as you discover how much crushed boiled sweets they need – it’s easy to be mean and equally easy to overdo it and have them boiling over and causing a mess.